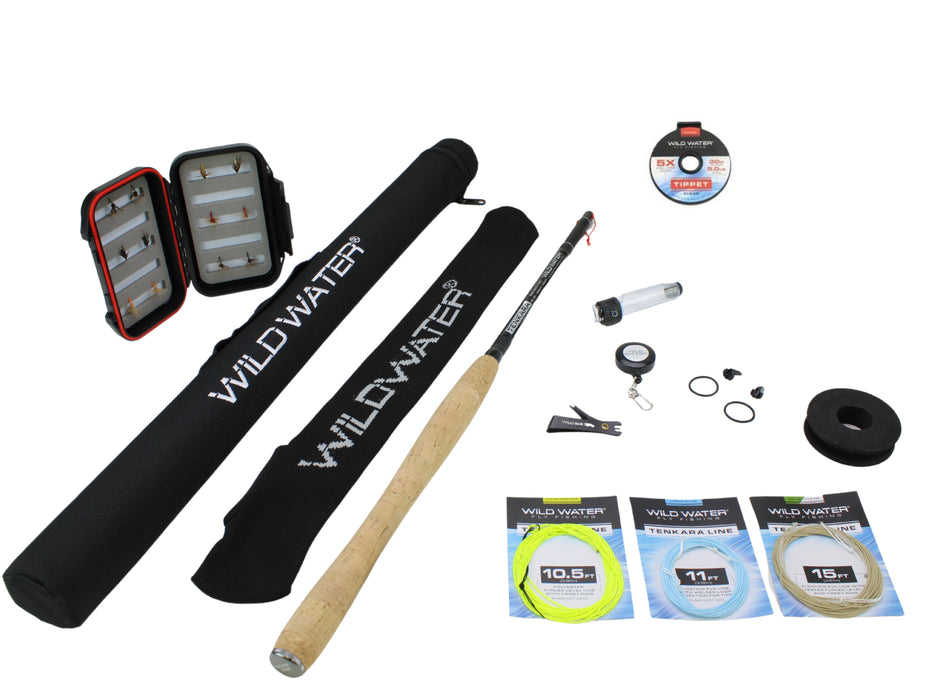
Before you assemble your fly rod or start casting, it helps to know what each part is called and what it does. When you understand how the pieces work together, setup becomes quicker and troubleshooting gets easier. This guide covers every component from the tip to the handle, so you'll know exactly what you're looking at when you open your kit.
Tip Top
The tip top is the small guide at the very end of your fly rod. It's the final point where your fly line exits the rod during a cast. Because it's the thinnest and most delicate section, it's also the most vulnerable to damage. Always store your rod with the tip protected, and avoid bending it at sharp angles when threading your line.
Guides
Guides are the small rings that run along the length of the rod blank. They keep your fly line aligned and control how it travels during casting and retrieval.
The stripper guide is the largest guide, located closest to the handle. It's usually made with a silicone carbide insert to reduce friction as line shoots through during a cast. You'll notice it right away because it's noticeably bigger than the others.
Above the stripper guide, you'll find a series of smaller snake guides. These lightweight wire loops reduce overall rod weight while still directing your line smoothly toward the tip. On most fly rods, you'll count anywhere from 6 to 10 snake guides depending on rod length.
Ferrules
Ferrules are the connection points where rod sections join together. The male ferrule is the slightly narrower end that slides into the female ferrule on the next section. A proper fit here is important. Loose ferrules can cause sections to separate mid-cast, while forcing them too hard can make them nearly impossible to pull apart later.
When connecting ferrules, push them together with a slight twisting motion and make sure your guides line up. You'll check alignment by looking straight down the rod from the tip.
Blank
The blank is the rod itself, minus all the hardware. It's the long, tapered tube that gives your rod its action and power. Most modern fly rod blanks are made from graphite, fiberglass, or a combination of both. The blank determines how your rod flexes, how much weight it can handle, and how far you can cast.
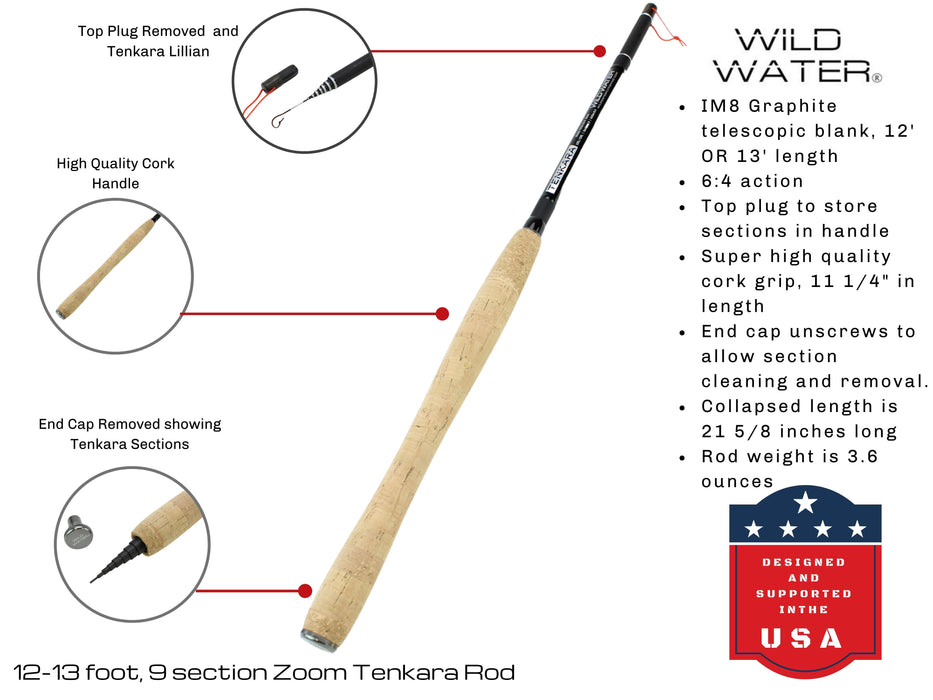
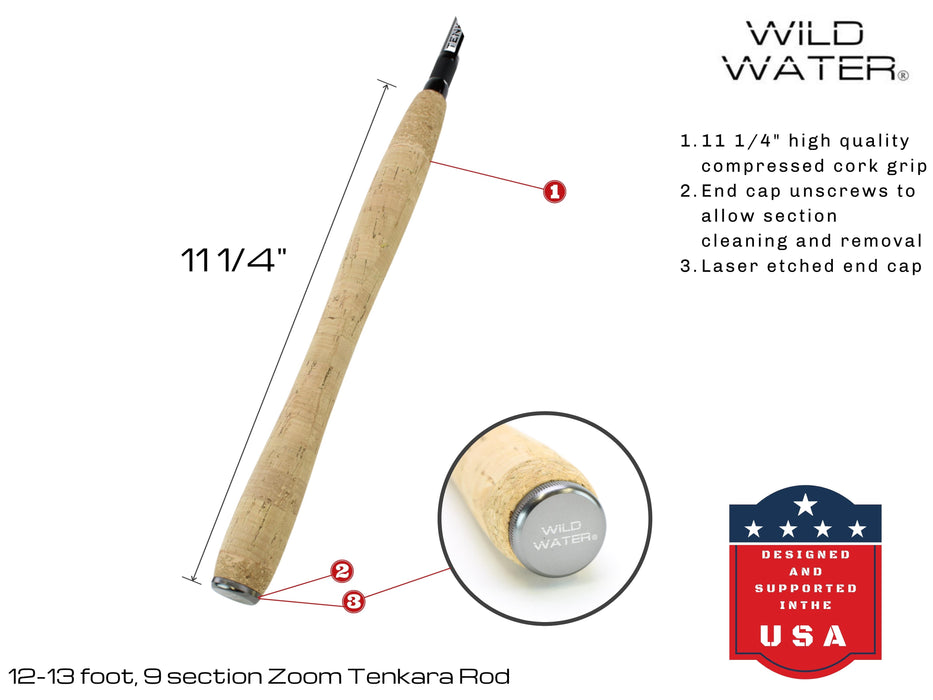
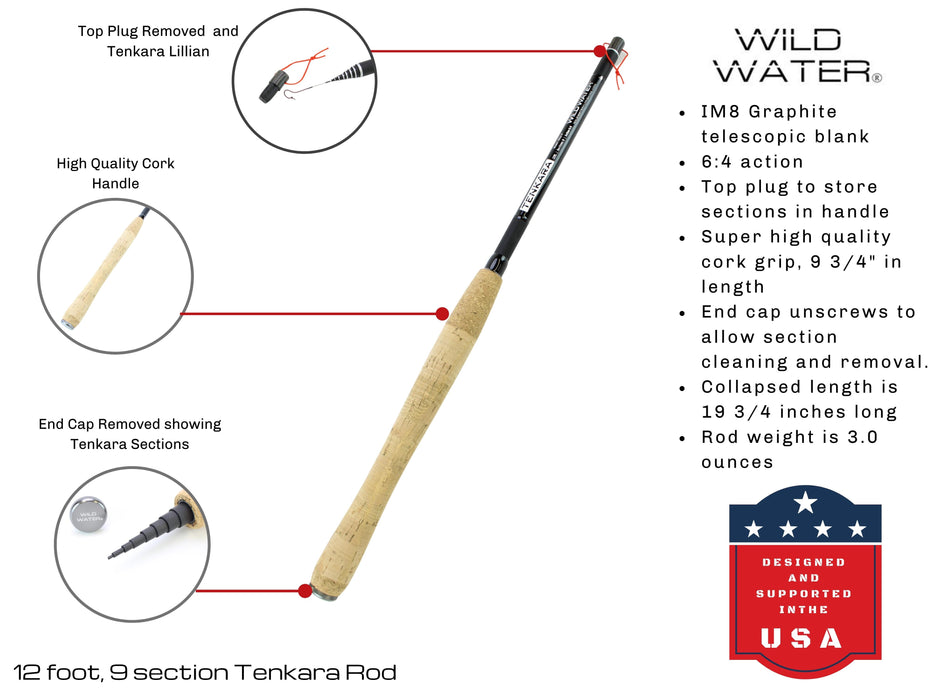
Handle (Grip)
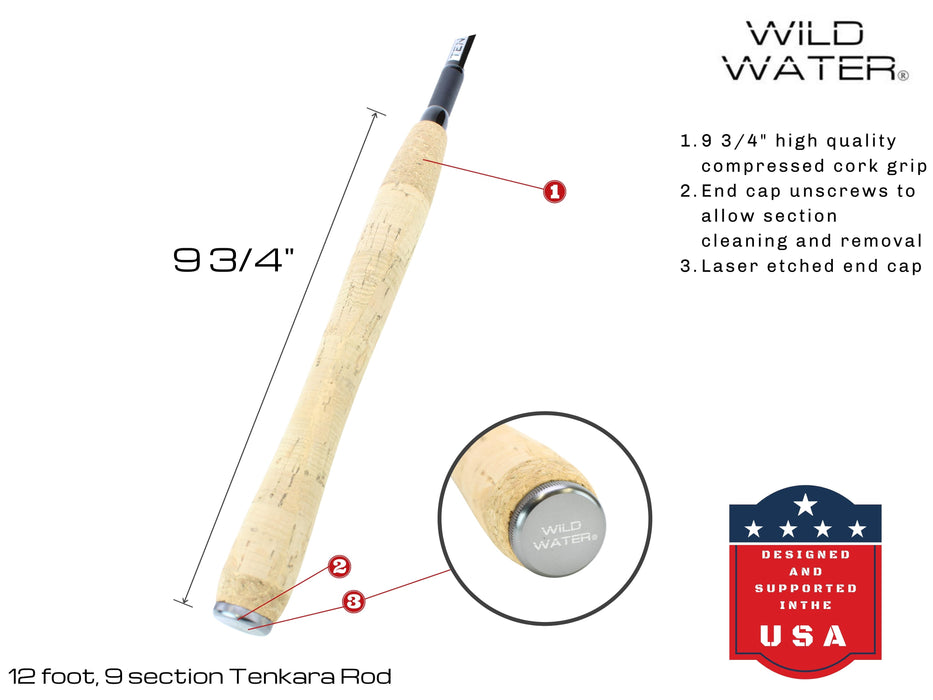
The handle is where you hold the rod during casting and fishing. Most fly rod handles are made from cork, which provides a comfortable grip, absorbs moisture, and stays relatively light. Some entry-level rods use EVA foam instead, which is more durable but slightly heavier.
Handle shape varies depending on the rod's intended use. A half wells grip (slight swell at the front) is common on lighter trout rods, while a full wells grip (swells at both ends) gives more leverage on heavier rods built for larger fish.
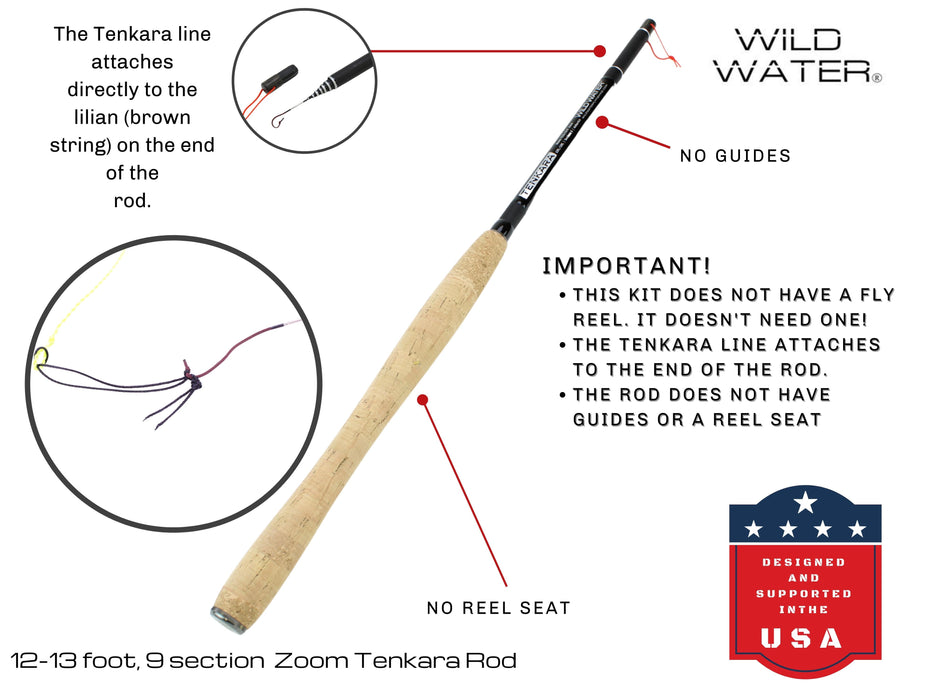
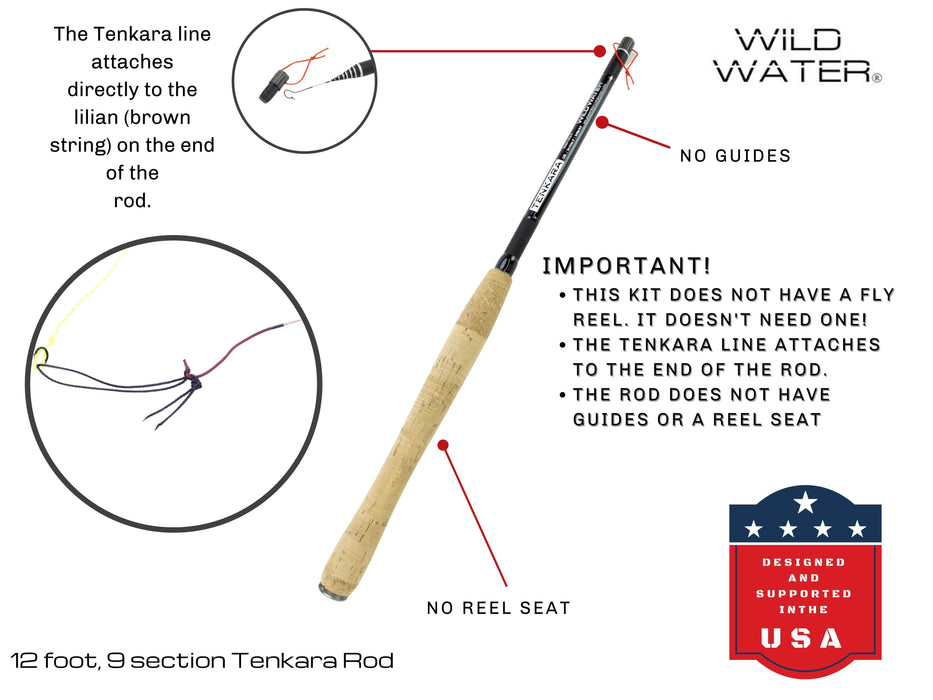
Reel Seat
The reel seat sits just below the handle. It's the hardware that holds your fly reel in place. Most reel seats have a threaded locking mechanism with two hoods, one fixed and one adjustable. You slide the foot of your reel under the fixed hood, then tighten the threaded ring to secure it under the locking hood.
Hook Keeper
The hook keeper is a small wire ring mounted on the blank just above the handle. When you're walking between spots or done fishing for the day, you hook your fly here to keep it secure. It's a simple part, but it saves you from snagging your fly on clothing, gear, or yourself.
Fighting Butt (Heavier Rods Only)
On rods built for bigger fish (typically 8-weight and above), you might find a short extension below the reel seat called a fighting butt. This gives you a place to brace the rod against your forearm or body when battling strong fish. Lighter trout rods usually skip this part to save weight.
See the Parts in Action
Now that you can name each section of your fly rod, this video shows how they all connect during assembly. Pay attention to how the ferrules line up and why you assemble from the middle out instead of starting at one end.
Quick tip from the video: Don't assemble your rod from tip to handle or handle to tip. Instead, connect the bottom two sections, then connect the top two sections, and finally join them in the middle. This keeps you from holding a long, floppy rod that could bend too far and snap.
Next Steps
Now that you know what each part is called, you're ready to put your rod together properly.
How to Assemble Your Fly Rod →