To set up a fly rod and reel, you assemble the rod sections, mount the reel, thread fly line through the guides, and tie on a fly. The whole process takes about 10 minutes once you've done it a few times.
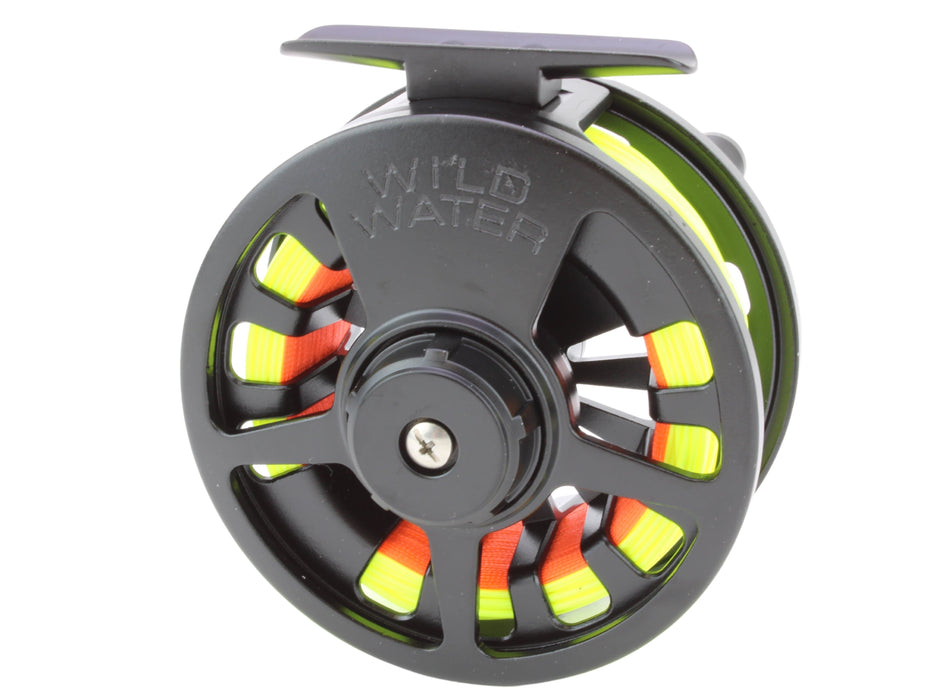
If you're using a Wild Water combo kit, you'll skip the most technical steps entirely. The reels arrive pre-spooled with backing and fly line already attached, so you can focus on learning to cast rather than fumbling with complicated knots before you even reach the water.
Key Takeaways
- The improved clinch knot is the only fishing knot you need to tie on your first fly.
- Proper rod assembly ensures your guides align for smooth casting.
- Proper storage after each trip will extend your equipment's life for years.
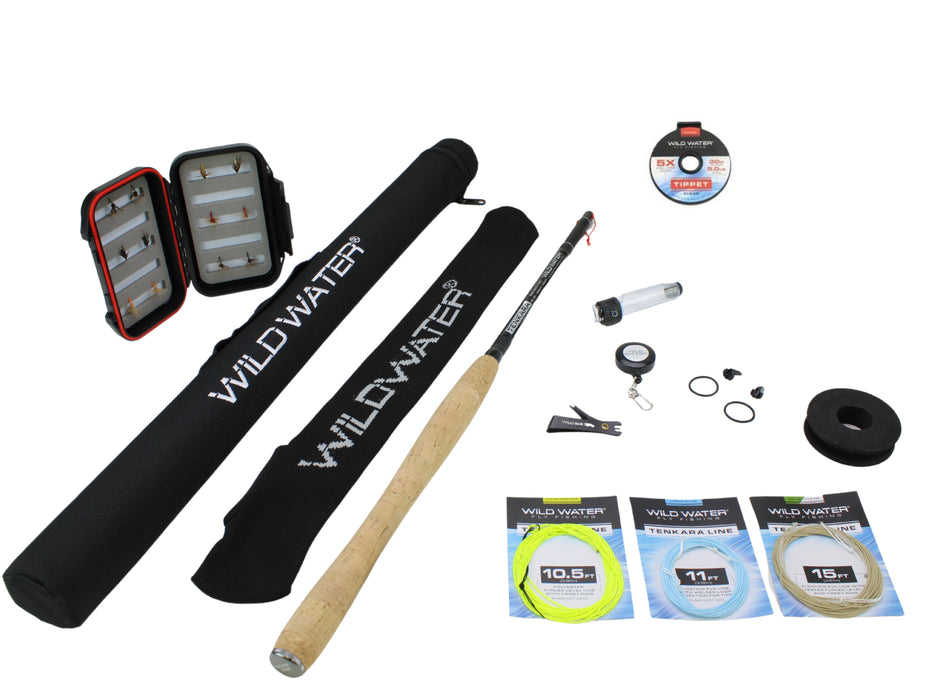
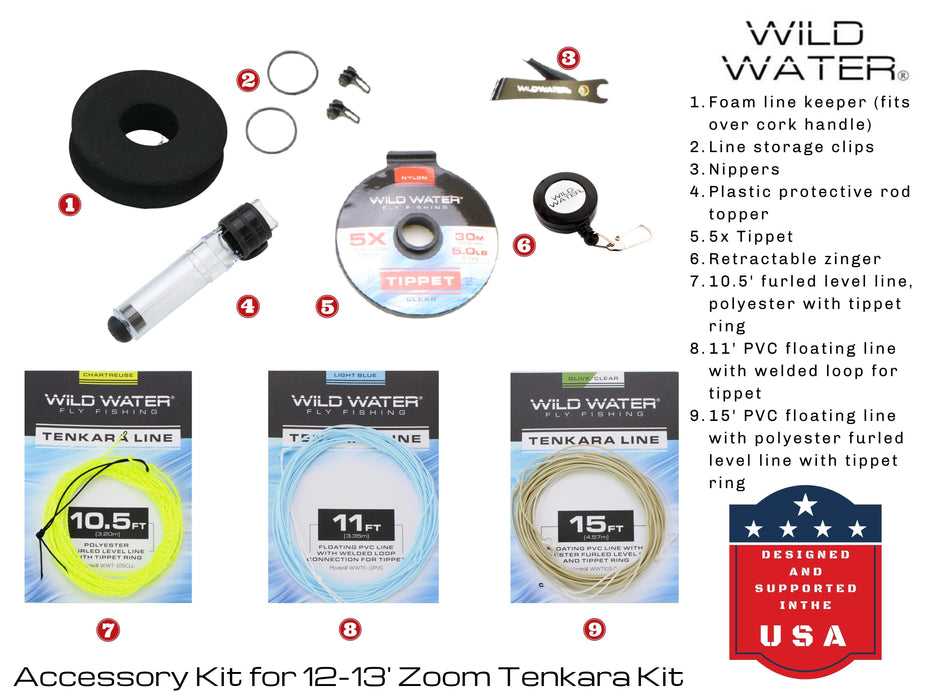
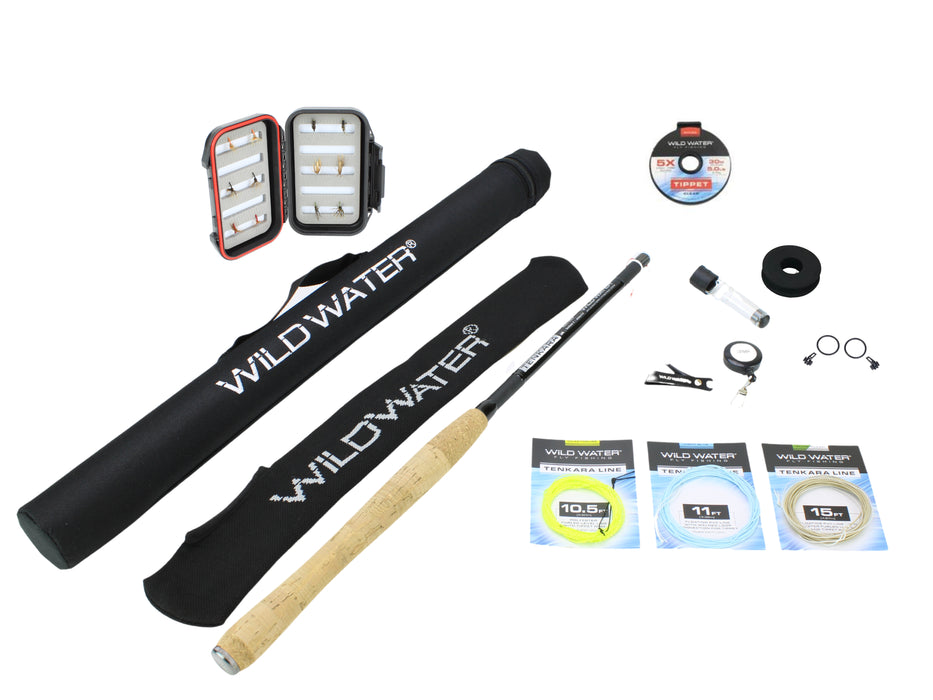
Finally, here's what comes in a typical Wild Water combo kit:
| Component | Pre-Assembled? |
|---|---|
| Fly Rod (4-piece) | No, you assemble |
| Fly Reel | Yes, mounted separately |
| Fly Line + Backing | Yes, pre-spooled |
| Tapered Leader | Yes, attached to line |
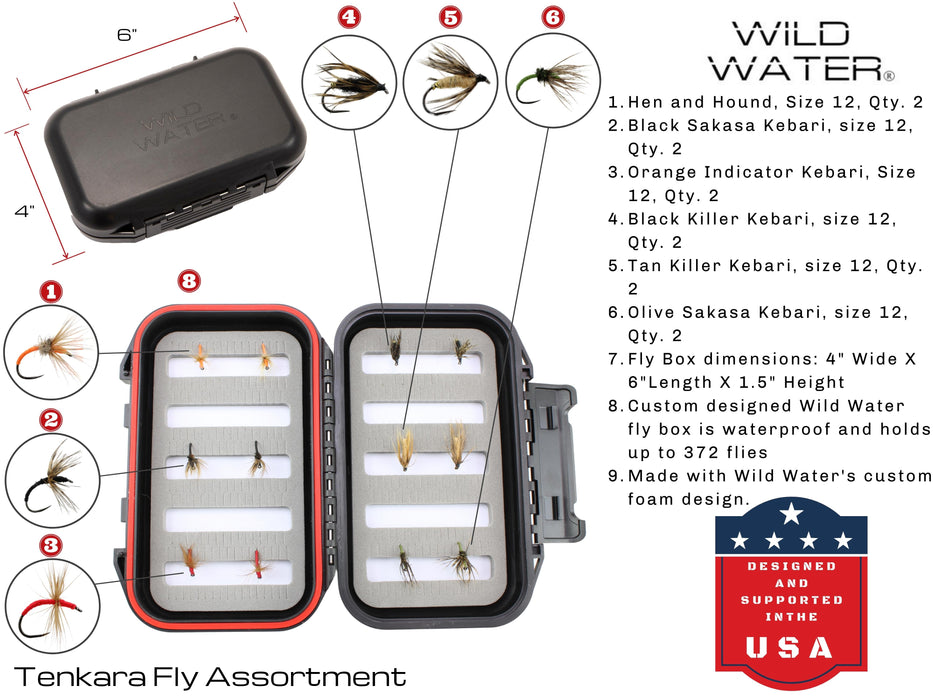
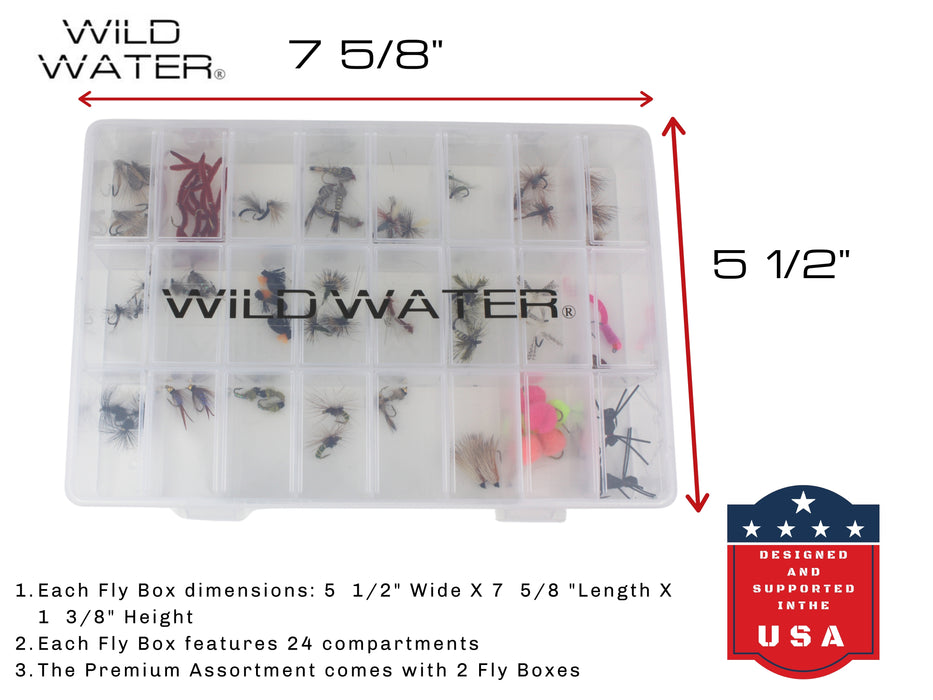
| Starter Flies | Yes, included in kit |
| Rod Case | Yes, included |
Rod Assembly: Putting Your Fly Rod Together
Most fly rods come in 4 pieces for easy transport. You can fit them in a car, strap them to a backpack, or toss them in overhead luggage. Proper assembly ensures the rod guides (those little metal loops running up the rod) align correctly for smooth fly line flow.
How to Assemble a 4-Piece Fly Rod
Start with the two thinnest sections at the tip end and work toward the butt section. Each connection point is called a ferrule, and most Wild Water rods have small alignment dots to help you line everything up.
Insert the male ferrule into the female ferrule and twist gently while pushing. The sections should fit snugly without forcing. Once assembled, look down the rod from butt to tip to confirm all rod guides form a straight line. If they zigzag, loosen the connections and realign.
Pro tip: Never force sections together or pull them apart without twisting. That's how you damage ferrules and end up with a stuck or broken rod.
If you're more of a visual learner, this quick video walks you through each step of the assembly process.
Common Rod Assembly Mistakes to Avoid
The most common mistake? Forcing sections together without twisting. This damages the ferrules and can create permanent looseness. Misaligned guides cause fly line tangles during casting, which gets frustrating fast.
Over-tightening creates its own problem. If sections get stuck, grip close to the ferrule and twist while pulling. Don't yank from the ends or you risk snapping the rod. A simple prevention trick: apply a thin layer of candle wax to male ferrules before assembly. This helps sections slide together smoothly and come apart easily.
This short video shows why careful handling matters and how quickly things can go wrong.
For detailed instructions with photos, check out our rod assembly guide. And if you're shopping for your first rod, browse our fly rod collection.
Mounting the Reel: Attaching Your Fly Reel to the Rod
The fly reel attaches to the reel seat at the bottom of the fly rod's butt section. This is the threaded portion with two locking rings.
Left Hand vs. Right Hand Retrieve
Here's something that confuses a lot of new anglers. Most right-handed fly fishermen reel with their left hand. The reason is because you cast and fight fish with your dominant hand, and switching hands mid-fight is awkward. So, the reel handle should face your non-dominant hand.
Wild Water reels convert between left and right retrieve. Make this decision before your first fishing trip, though. Changing the retrieve direction requires re-spooling the line, which takes about 10 minutes. If your handle ends up on the wrong side, our retrieve change tutorials walk you through the conversion process.
How to Attach the Fly Reel to the Rod
Loosen both locking rings on the reel seat. Slide the reel foot (the flat bar at the base of the reel) into the slot. Tighten both rings until the reel feels secure.
When mounted correctly, the reel should hang below the rod with the handle facing your non-dominant hand. Give it a wiggle to confirm it's tight. A loose reel can fall off during casting, and that's a bad time to discover the problem.
Watch this 2-minute video to see the mounting process from start to finish.
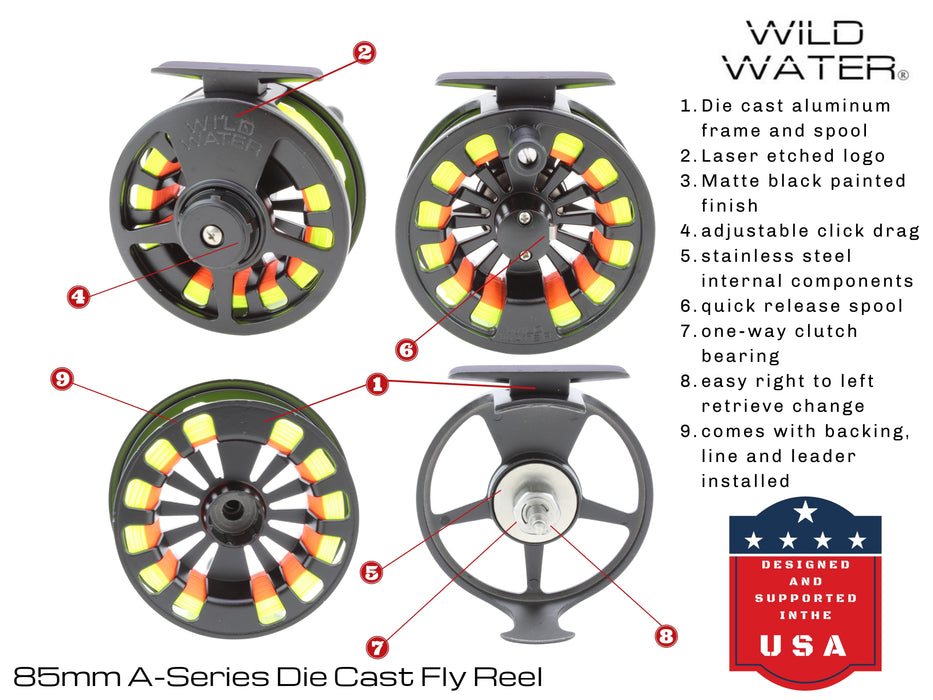
Our guide to fly reel components explains each part and what it does to help you understand your reel better. You can also shop fly reels if you're looking to upgrade.
Threading the Fly Line Through the Rod Guides
With your rod assembled and reel mounted, it's time to connect the fly line from the reel to the rod tip. This step prepares you to attach a leader and tie on your first fly.
How to String Up the Fly Line
Pull 15 to 20 feet of fly line off the reel. Here's a trick that makes threading easier: double the line over to create a loop. This loop is much easier to thread through rod guides than the thin leader end.
Thread the looped line through each rod guide, starting at the reel and working toward the rod tip. Pull the leader through until several feet extend past the tip.
This video demonstrates the loop trick and shows exactly how to thread each guide without missing any.
Avoiding Line Tangles and Wraps
The most common threading mistake is wrapping the fly line around the rod tip instead of through it. If your casting feels heavy or weird, stop and check every guide. I've seen experienced anglers cast for ten minutes before realizing their line was wrapped.
Step on the fly line while threading to prevent it from slipping back through the guides. If line wraps around the rod tip, don't try to fix it mid-cast. Unthread completely and restring. Never cast with wrapped line because it can damage your rod tip.
For troubleshooting help, see our guide on fixing wrapped fly line.
Understanding Your Fly Line Setup
A complete fly fishing setup includes four components that connect in sequence: backing, fly line, leader, and tippet. Understanding how they work together helps when you need to replace or repair connections down the road.
How Backing, Fly Line, Leader, and Tippet Connect
Backing is a thin braided line, usually 20-pound test, that attaches directly to the reel arbor (the center spindle) using an arbor knot. It fills the reel spool and provides extra length when a large fish makes a long run.
Fly line connects to backing with an albright knot. This is the thick, weighted line that carries your fly during casting. Unlike spinning gear where the lure's weight provides casting distance, fly fishing uses the line's weight. Floating fly line works best for beginners because it's easiest to see and manage.
Tapered leader attaches to the fly line's end loop. It's nearly invisible and tapers from thick to thin, creating a smooth transition that doesn't spook fish.
Tippet is additional thin line you tie to your leader as it shortens from changing flies. For a deeper explanation, read our guide on tippet vs. leader.
If you want to understand line weights better, our fly line weight guide breaks it down. You can also shop tapered leaders and tippet material when you need replacements.
How to Attach a Leader and Tippet
The leader connects your fly line to your fly with an invisible transition. Fish are surprisingly good at spotting thick line, so this gradual taper matters.
Loop-to-Loop Connection for Leaders
Most modern fly lines have a welded loop on the end, and quality leaders also have a loop at the butt end. Connecting them is simple once you see it.
Pass the leader's loop through the fly line's loop. Then pass the entire leader through its own loop and pull tight. This creates a secure connection that's easy to undo when you need to change leaders. If your fly line lacks a loop, you'll need a nail knot to connect the leader directly.
For step-by-step instructions on replacing worn leaders, check out when and how to replace your leader.
When to Add Tippet to Your Leader
Leaders shorten every time you change flies. Eventually, your leader gets too short and the thick portion sits too close to your fly. That's when you add tippet to "regrow" your leader.
Tie 18 to 24 inches of tippet to your leader tip using a surgeon's knot. Match the tippet size to your leader's tip diameter. A 5X leader takes 5X or 6X tippet. Going thinner lets you fish lighter line for spooky trout in clear water.
Check the tippet size and strength chart to match sizes correctly. You can find fluorocarbon leaders and nylon tippet in our shop.
Tying On Your First Fly with the Improved Clinch Knot
The improved clinch knot secures your fly to the leader or tippet and holds under pressure when fighting fish. Once you learn this connection, you're ready to fish.
How to Tie an Improved Clinch Knot
Thread 4 to 6 inches of tippet through the hook eye. Wrap the tag end (the short piece) around the standing line 5 to 6 times. Pass the tag end through the small loop near the hook eye, then back through the large loop you just created.
Here's the part people skip: moisten the knot before pulling tight. Dry monofilament creates friction that weakens the knot. A little spit or water makes a big difference.
Pull the knot tight against the hook eye and trim the tag end close. Tug the fly firmly to test. If it slips, cut and retie. Get in the habit of checking knots periodically during fishing because they wear down over time.
Knots are easier to learn by watching than reading. This video breaks down each step so you can follow along with your own line.
For a visual guide, see our step-by-step clinch knot diagram. We also have a complete fly fishing knots reference for when you're ready to learn more.
How to Select a Fly for Your First Fishing Trip
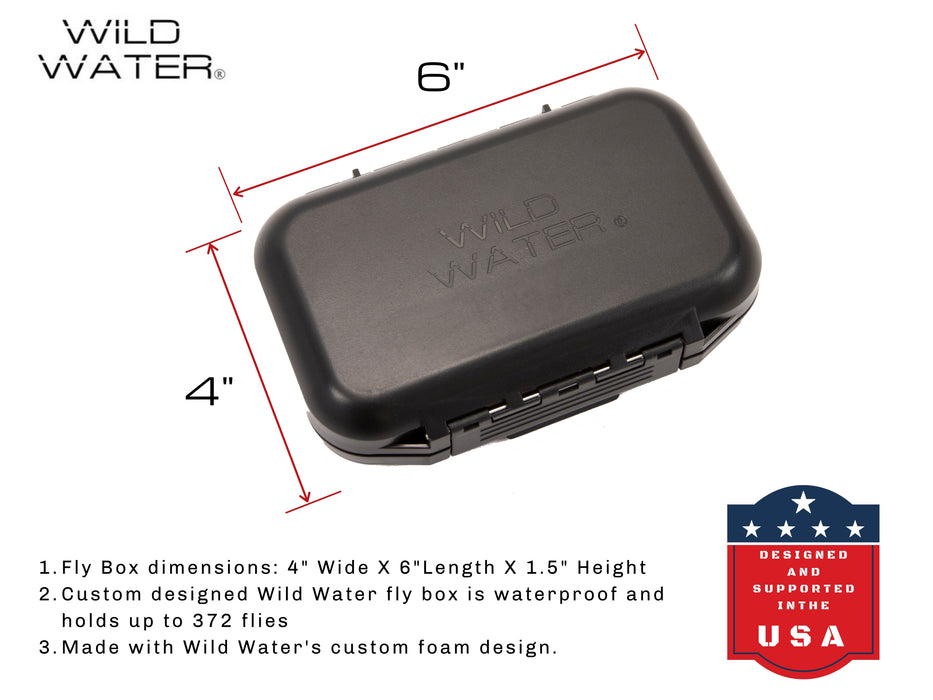
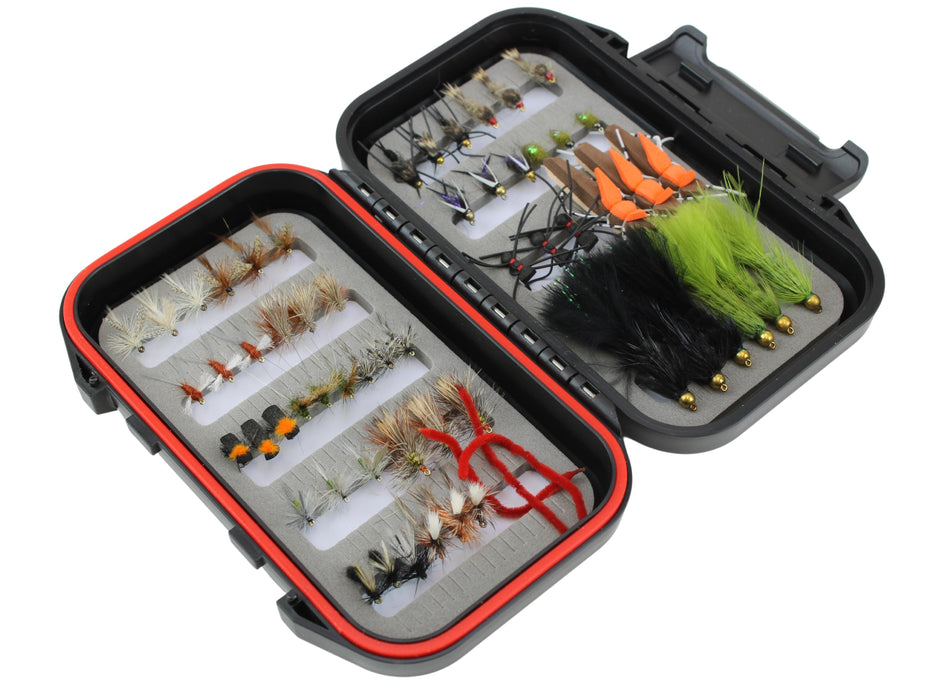
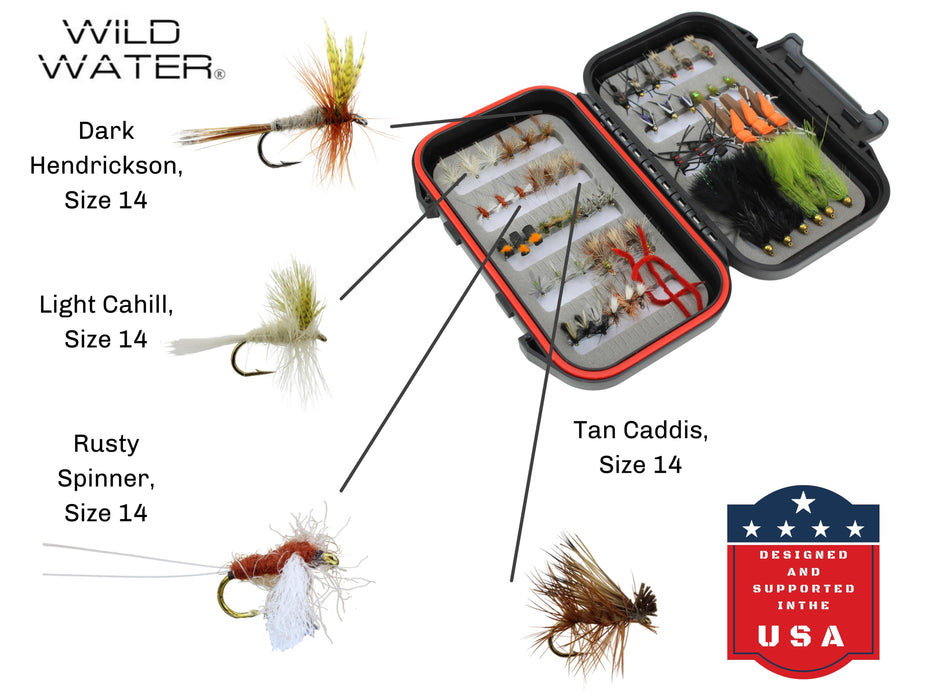
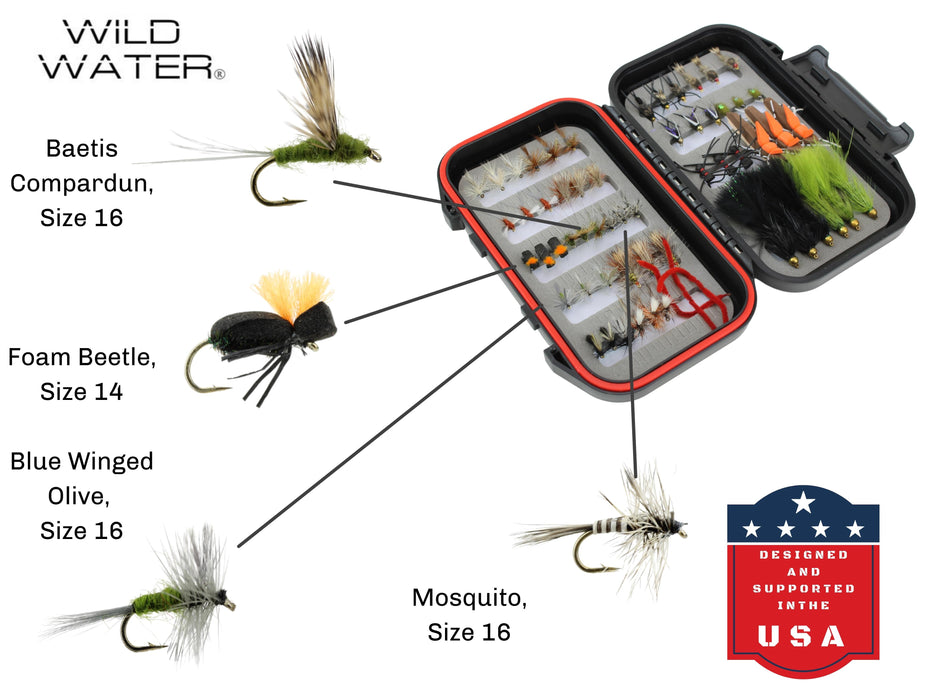
Your Wild Water kit includes starter flies matched to your rod weight and target species. But understanding basic fly selection helps you choose the right pattern when conditions change.
Your Starter Flies and What to Add Next
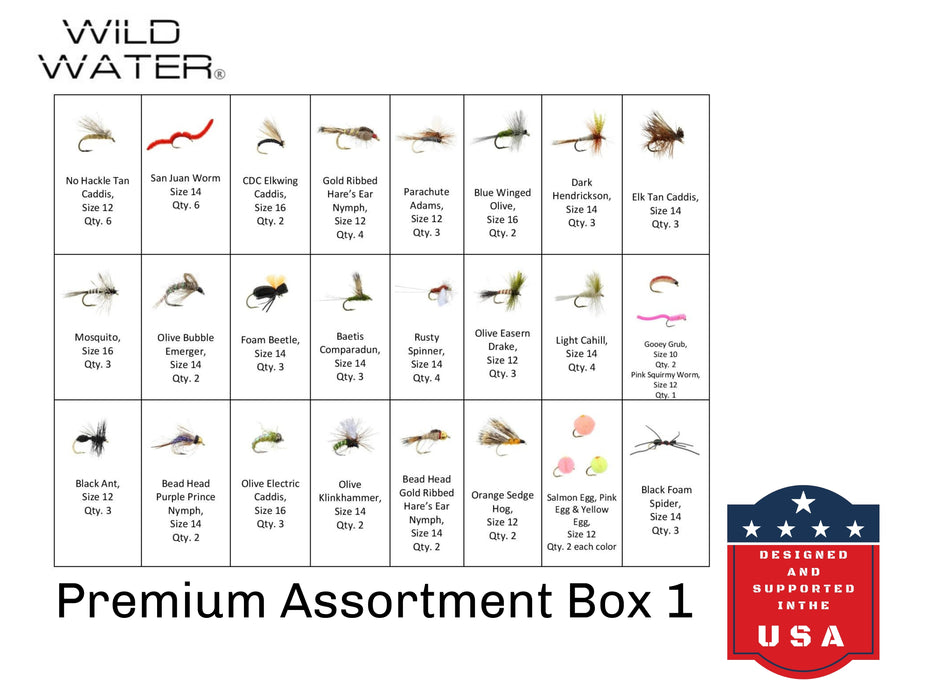
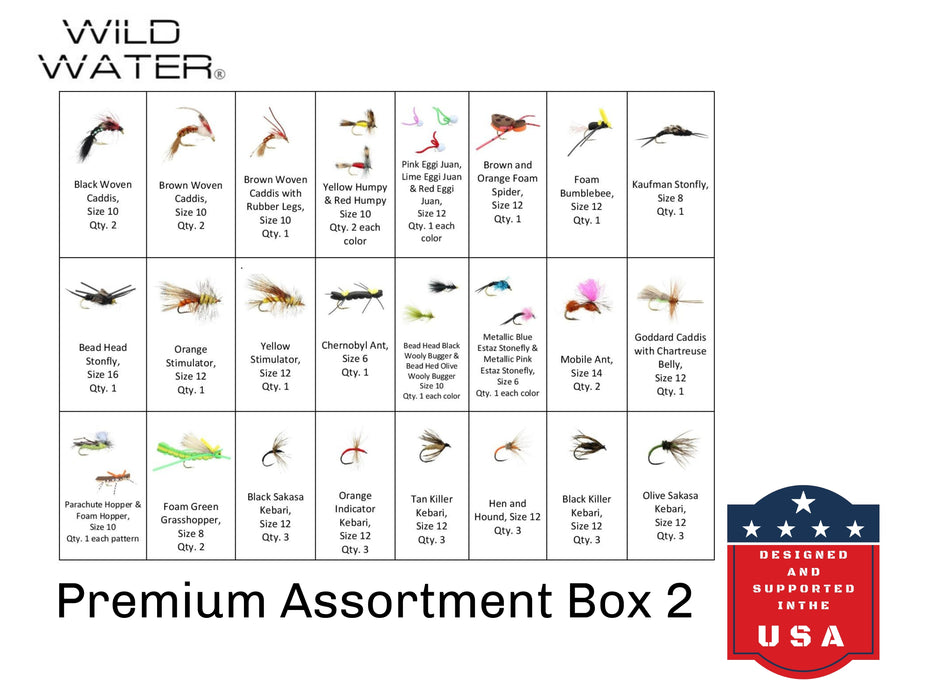
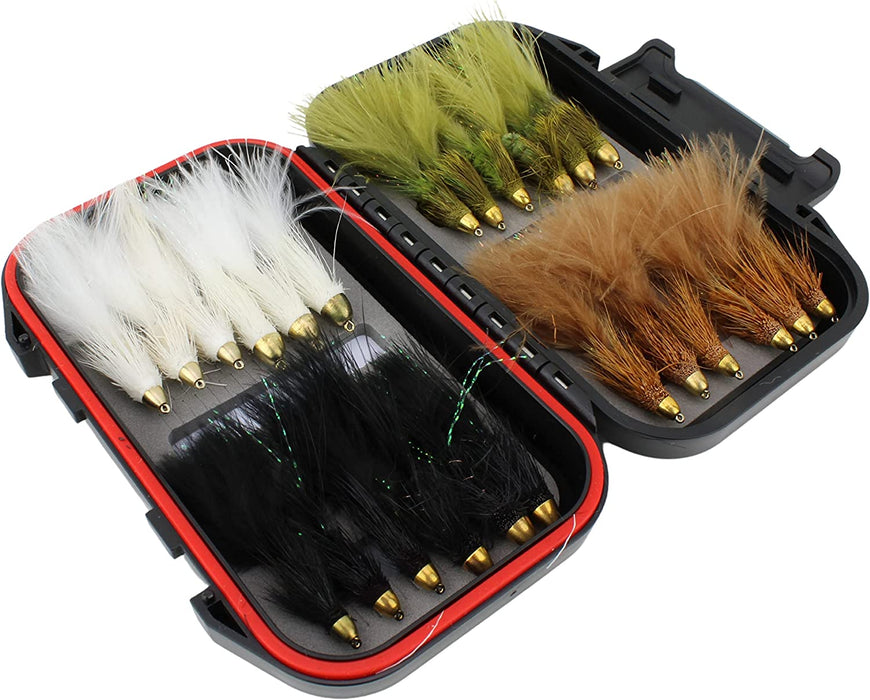
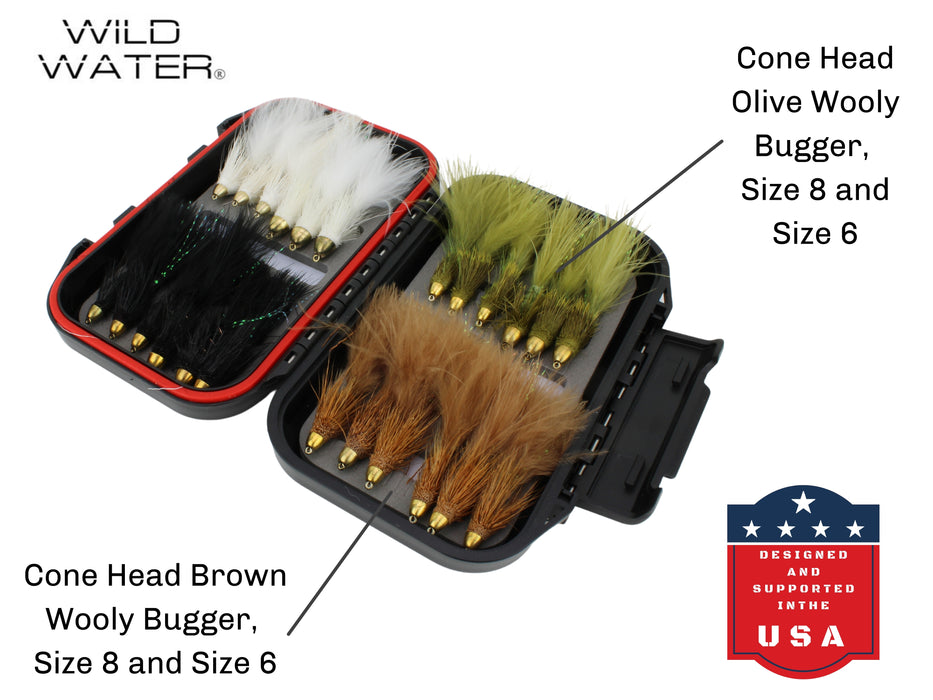
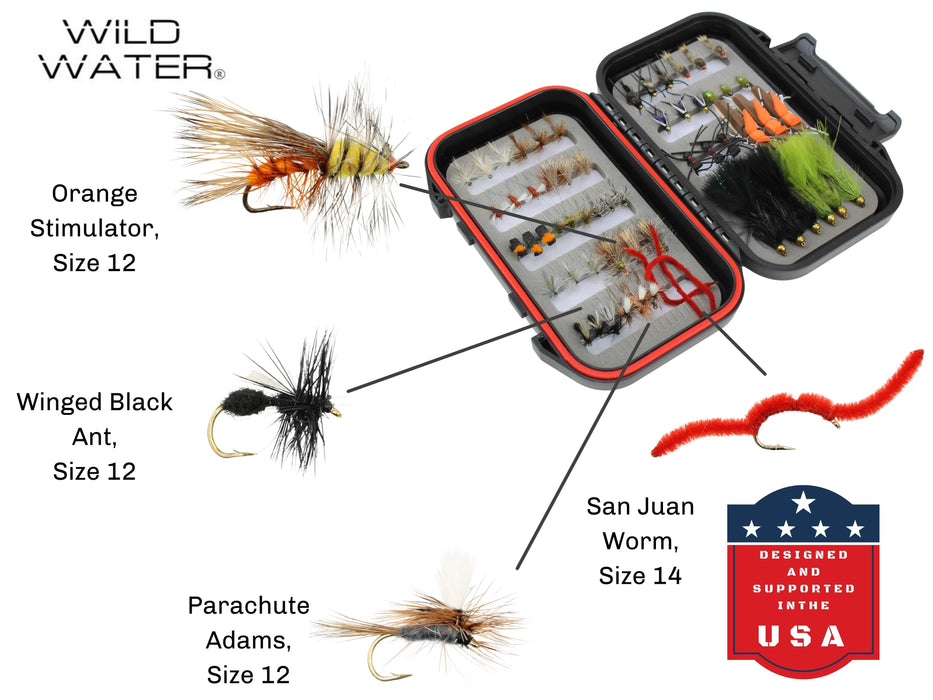
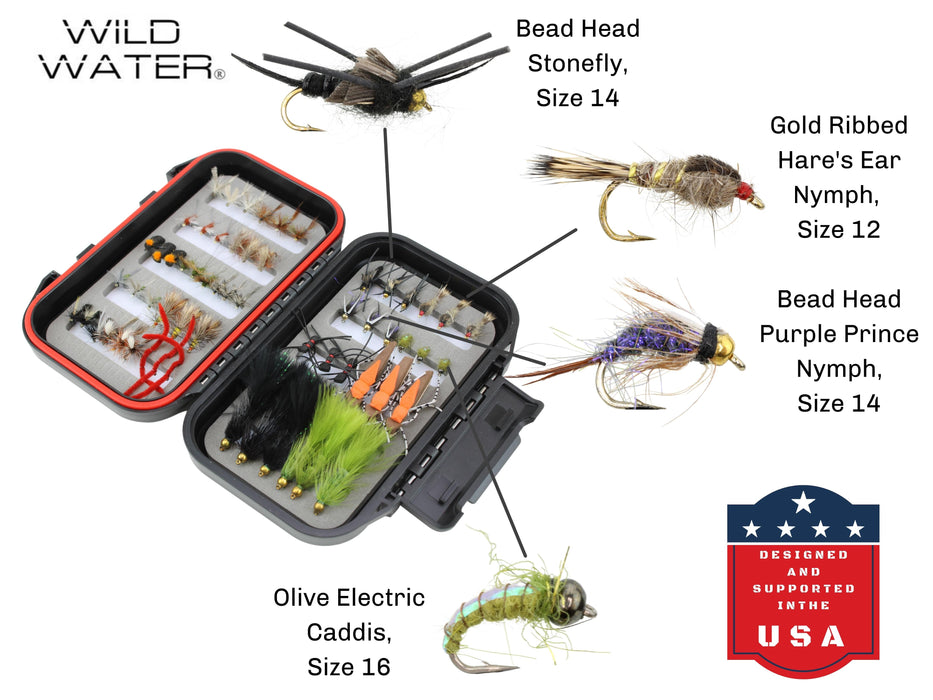
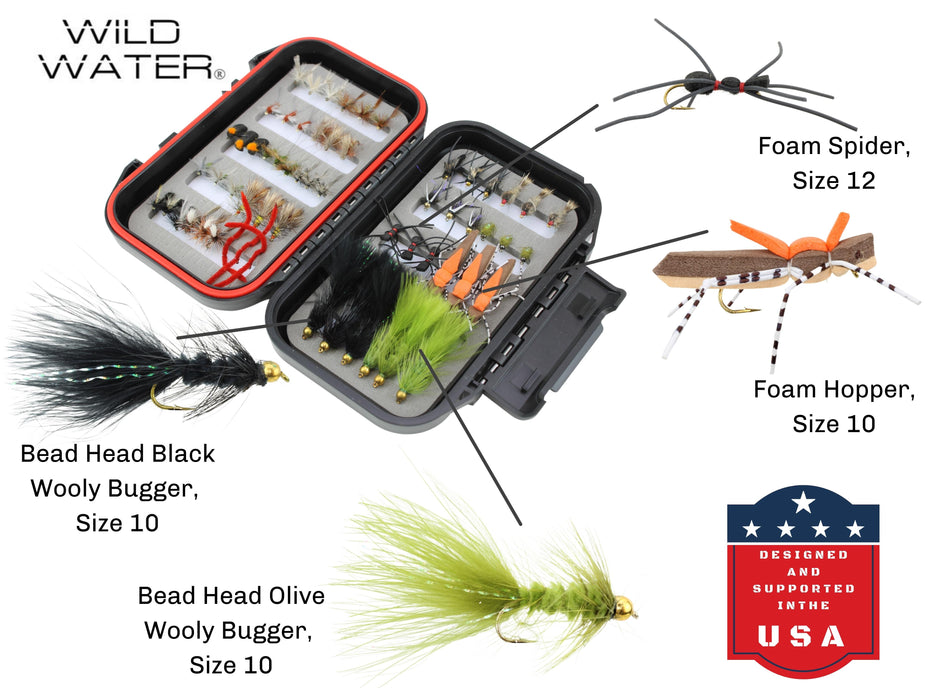
Standard freshwater kits include three types of flies. Dry flies float on the surface and imitate adult insects, while nymphs sink below the surface and imitate immature insects living underwater. Woolly buggers, on the other hand, are versatile streamers that imitate baitfish, leeches, or just something that looks edible.
Saltwater kits include different patterns like streamers and deceivers designed for bigger, faster fish. To understand the difference, read our guide on dry flies vs. wet flies.
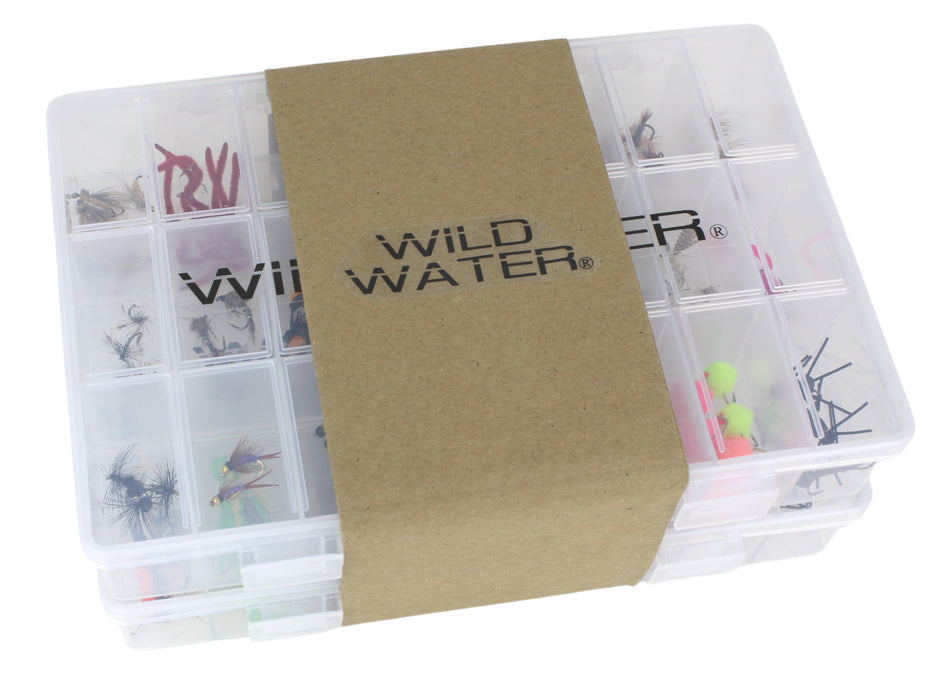
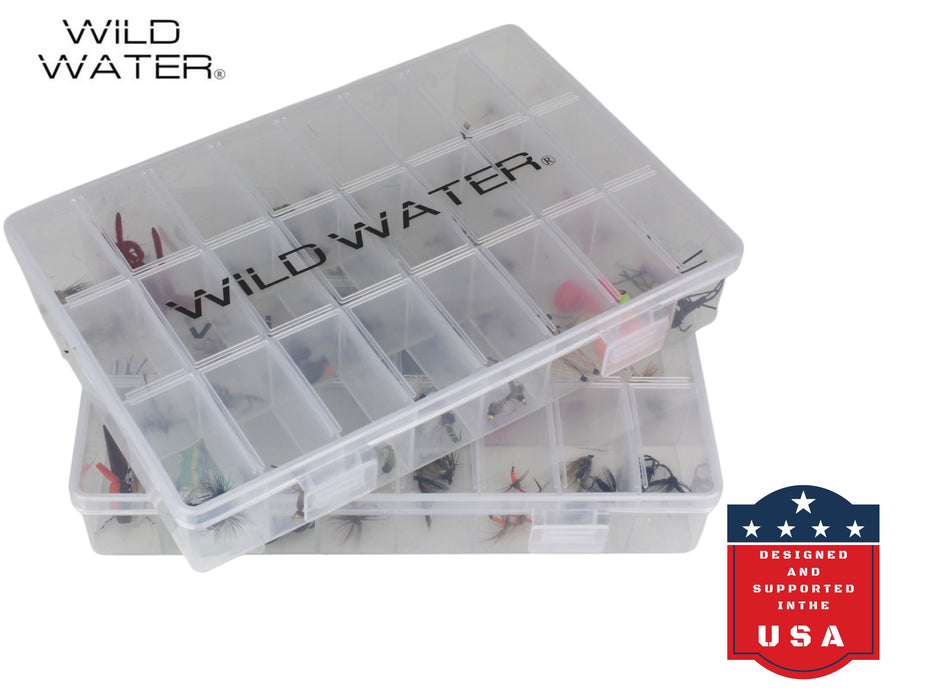
When you want to expand your selection, the Mini-Mega 60 fly assortment offers proven patterns for multiple species. Browse all fly assortments to find sets matched to your fishing style.
Matching Flies to Target Species
Different fish eat different things. Here's a quick reference:
- Trout: Start with a size 14-16 dry fly like a Parachute Adams or Elk Hair Caddis. For subsurface fishing, use size 12-16 nymphs like Pheasant Tail or Hare's Ear.
- Bass: Size 6-10 woolly buggers or poppers work great. Bass like movement and commotion.
- Panfish: Small poppers in size 8-10 or dry flies in size 12-14 will catch bluegill and crappie all day.
When you're unsure what to use, tie on a black or olive woolly bugger. It catches nearly everything in freshwater. Seriously.
For species-specific recommendations, check out our guides on best trout flies, best bass flies, and choosing the right fly. You can also shop by species: trout flies, bass poppers, and panfish flies.
Storing Your Fly Rod and Reel After Fishing
Proper storage extends the life of your fly fishing setup. Rods can warp, reels can corrode, and line can develop memory coils if stored carelessly. Disassembly is basically assembly in reverse, with a few precautions.
How to Take Apart and Store Your Fly Rod
Reel in your fly line until only the leader extends past the rod tip. Hook your fly into the hook keeper (a small wire loop near the handle) or wrap it around a guide foot. This keeps everything secure during disassembly.
Twist and pull rod sections apart, working from tip to butt. Store them in your protective rod case with the butt section going in first. Don't lean assembled rods against walls or car bumpers. They fall. They break. It happens to everyone once.
This video covers proper disassembly technique and shows how to pack your rod safely.
For detailed instructions, see our complete storage guide. If you need a protective case, shop fly rod cases.
Caring for Your Reel Between Trips
If you fished saltwater, rinse your reel with fresh water as soon as possible. Salt corrodes metal quickly. For freshwater fishing, a quick wipe-down is usually enough.
Loosen the drag completely during storage. Keeping drag tension compresses the drag washers over time and reduces their effectiveness. Occasionally remove the spool to check for line tangles or debris behind it. Store everything in a cool, dry place away from direct sunlight.
Here's how to pop the spool off for inspection and cleaning.
Check out our fly fishing tools for accessories that make maintenance easier.
Choosing Your First Wild Water Kit
Now that you understand how everything connects, you're ready to pick the right setup. Here's how to decide:
- Targeting trout in streams? A 5/6 weight kit handles most freshwater situations. It's versatile enough for panfish and small bass too.
- Fishing smaller creeks or need a shorter rod? A 3/4 weight kit offers more finesse and works well in tight spaces.
- Chasing bass or larger freshwater species? A 7/8 weight kit provides the backbone for bigger flies and stronger fish.
- Want a specific recommendation? Our best starter kits comparison breaks down each option. You can also browse all fly fishing kits by species to match your local water.
If you get stuck during setup or have questions about which kit fits your needs, U.S.-based customer support is available at 585-967-3474. We're anglers too, and we're happy to help.
FAQs About Setting Up a Fly Rod and Reel
How much backing should I put on my fly reel?
The amount depends on reel size. For 3/4 weight reels, use 75 yards. For 5/6 weight, 100 yards works well. 7/8 weight also takes about 100 yards, and 9/10 weight benefits from 125 yards.
Can I use any fly line weight on my rod?
Fly line weight should match your rod weight for balanced casting. A 5-weight rod works best with 5-weight line. Some anglers "overline" by one size for easier loading at short distances, but that's a personal preference to explore after you've learned the basics.
How often should I replace my fly line?
Quality fly line lasts 1 to 3 seasons depending on use and care. Replace it when the line starts to crack, feels sticky, or won't float properly after cleaning. If your casts suddenly feel different, worn line might be the culprit.
Do I need waders to start fly fishing?
No. Many productive waters can be fished from shore or by wading wet in warm weather. Start without waders to learn casting and fly selection first. You can add waders later when you want to access deeper water or fish in cold conditions.
What's the difference between floating and sinking fly line?
Floating line stays on the surface and works best for dry flies and shallow nymphing. It's the right choice for beginners because it's easier to manage and see. Sinking line drops below the surface for streamers and deep nymphing. You'll probably want floating line for your first season.